7 Days to Die comes with pre-generated worlds that can be used, stable and experimental versions come with different names, check them below and use them based on the version you have installed.
1.0 PREGEN NAMES:
- Pregen04k1
Pregen04k2
Pregen04k3
Pregen04k4
Pregen06k1
Pregen06k2
Pregen06k3
Pregen06k4
Pregen08k1
Pregen08k2
Pregen08k3
Pregen08k4
Pregen10k1
Pregen10k2
Pregen10k3
Pregen10k4
A20.* PREGEN NAMES:
- PREGEN6k
- PREGEN8k
- PREGEN10k
A19 OR OLDER VERSIONS PREGEN NAMES:
- PREGEN01
- PREGEN02
- PREGEN03
- Stop Server and navigate to the Configuration Files and use Config Editor on serverconfig.xml.
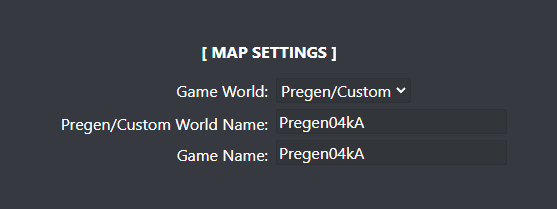
- Scroll to [Map Settings] and on Game World select Pregen/Custom.
- Under Pregen/Custom World Name and Game Name fields, type the name of the pregen world you want to load, type same name on both fields.
- Then click Save & Exit and then Start your server.
WARNING! The first time can take up to 1 hour for the map to be fully generated. Don't stop the server or the map will be corrupted and you'd need to start the generation again. You can follow the progress by clicking the Web Console button. Whilst the world is generating you can ignore the messages [GSM] GameSparks Connected. Once the world is generated the server will say GameServer.LogOn successful. Once it says this the server will be online you can check Activity & Stats button for more information and to see if your server is querying.
If you have any questions or you need some help please don't hesitate to contact our support team by opening a support ticket.


