


Minecraft Zombie Villager Cure: Step by Step
Have you ever come across a Zombie Villager in Minecraft and wished you could turn them back to their normal self? Well, now you can. Curing a Zombie Villager is not too difficult if you follow the right steps. You're going to need a few key items to get started, but the rewards of curing a Zombie Villager are well worth the effort. Not only will you have a new Villager to trade with, but you'll also feel good about restoring them back to their normal state. So grab your potions and golden apples, and let's get to curing. By the end of this, you'll have a new Villager friend and a sense of accomplishment. The path to becoming a Zombie Villager cure expert starts here.
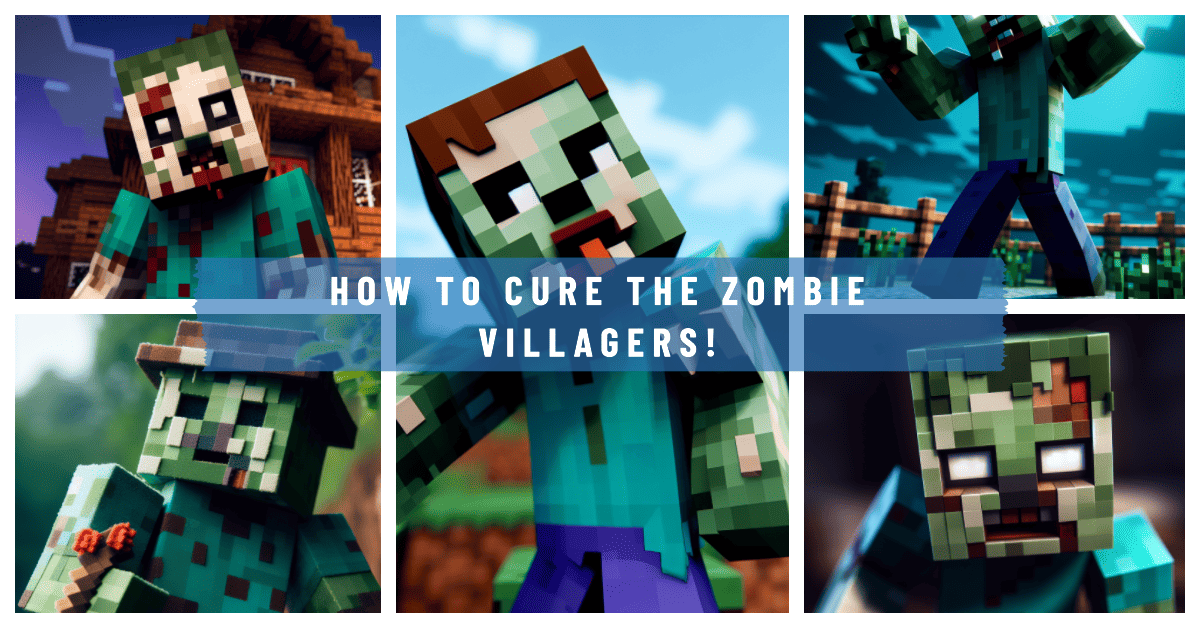
Understanding Zombie Villagers in Minecraft
In Minecraft, zombie villagers are hostile mobs that spawn in place of regular villagers. They have a 5% chance to spawn instead of a regular zombie, and can also spawn if a zombie kills a villager. However, zombie villagers can be cured and turned back into normal villagers.
To cure a zombie villager, you need a golden apple and a splash potion of Weakness. Once you have these items, find a zombie villager and throw the potion of Weakness at it. This will give the zombie villager the “Weakness” status effect, making it docile.
Next, right-click on the zombie villager with the golden apple. Particles will appear, indicating that the zombie villager has started the curing process. The zombie villager will shake for a few seconds as it transforms.
The curing process takes between 3 to 5 minutes. The zombie villager will slowly turn into a normal villager during this time. You must protect the zombie villager from sunlight and other hostile mobs while it's curing.
Once the curing process is complete, the zombie villager will turn into a normal villager. Congratulations, you’ve successfully cured a zombie villager! The cured villager will have a random profession and will not despawn. You can now trade and interact with them like regular villagers.
Curing zombie villagers is a great way to repopulate a village if all the normal villagers have been killed. It also allows you to gain new villagers with different professions to suit your needs. With some time and effort, you’ll have a thriving village of cured villagers!
Gathering the Necessary Items to Cure a Zombie Villager
To cure a zombie villager in Minecraft, you'll need to gather a few supplies. The items required are:
- A splash potion of weakness
- A golden apple
Brewing the Splash Potion of Weakness
To brew the splash potion of weakness, you'll need a brewing stand, blaze powder, spider eye, and gunpowder. Add the ingredients to the brewing stand in this order:
- Add a bottle of water to the top slot.
- Add the blaze powder to the fuel slot at the bottom to power the brewing stand.
- Add the spider eye to the left slot. This will convert the water to a potion of poison.
- Finally, add the gunpowder to the right slot to convert the potion of poison into a splash potion of weakness.
Once brewed, the potion will appear in the completed potions slot on the right.
Finding a Golden Apple
Golden apples can be crafted using gold ingots and apples, or found in chests scattered around the Minecraft world. You'll need at least one golden apple to cure a zombie villager.
Now you have the necessary items, you're ready to weaken and cure a zombie villager. Splash the potion of weakness at the zombie villager, then feed it the golden apple. If successful, red sparks will appear and the zombie villager will begin shaking, eventually converting back to a normal villager. Congratulations, you've cured your first zombie villager!
Building a Safe Enclosure to Contain the Zombie Villager
To cure a zombie villager, you'll need to contain it in a safe enclosure. This prevents it from burning in sunlight or wandering off. Here are the steps to build a secure pen for your zombie villager:
Materials
- Oak fences or iron bars
- Trapdoors or gates
- Building blocks (cobblestone, planks, etc.)
Find a Shady Location
Select a shady area sheltered from direct sunlight. Dense forests or the shade of large buildings are ideal. You want to keep your zombie villager safe until cured!
Build the Walls
Construct walls 3 blocks high using your building blocks. Leave one side open for now. This will form the main enclosure to hold the zombie.
- Use oak fences, iron bars or glass panes for part of the wall. This allows you to see in and out, while still containing the zombie villager.
Add a Roof
Build a simple roof over the top of the enclosure to provide shade. Any solid block like cobblestone or planks will work. Make sure there are no holes or the zombie could burn in sunlight!
Add a Gate
Place a gate or trapdoors over the open side of your enclosure. This allows you to get the zombie villager in and out.
- Use a gate for easier access. Trapdoors can also work, but may be trickier to manoeuvre the zombie through.
Light the Interior
Add some torches to the inside of your enclosure so you can see clearly. Make sure no sunlight will directly hit the zombie villager.
Your secure zombie villager enclosure is now ready! Lure the zombie in with a weakness potion and golden apple to begin the curing process. Keep the enclosure shaded and the zombie contained, and soon you'll have a regular villager again!
Using a Splash Potion of Weakness on the Zombie Villager
To cure a zombie villager in Minecraft, you need to use a Splash Potion of Weakness. This potion will weaken the zombie villager so you can feed it a Golden Apple and complete the curing process.
Brewing the Splash Potion of Weakness
First, you’ll need to brew a regular Potion of Weakness. To make it, add 1 spider eye and 1 fermented spider eye to 3 water bottles. Then add 1 gunpowder to turn it into a splash potion.
Throwing the Potion
Once you have the Splash Potion of Weakness, you need to throw it directly at the zombie villager. Get close enough to ensure you hit your target, but be careful not to aggravate the zombie villager.
After throwing the potion, particles will appear around the zombie villager, indicating it has been successfully weakened. At this point, its behaviour will not change, but it will be receptive to eating a golden apple.
Feeding the Golden Apple
Immediately after the zombie villager has been weakened, you need to feed it a golden apple. Drop the golden apple on the ground directly in front of the zombie villager. It will pick up and eat the golden apple, starting the curing process.
Over the next few minutes, the zombie villager will shake and emit purple particles. Do not leave the area, as the process needs to complete for the villager to be cured. Once the particles turn into hearts, the zombie villager has been cured and reverted back to a normal villager.
Congratulations, you now have a new villager! The villager will have a random profession, so you may need to destroy and replace their workstation block to get the profession you want. Curing zombie villagers is a key part of repopulating villages and trading in Minecraft.
Feeding the Zombie Villager a Golden Apple to Complete the Cure
Now that you’ve splashed your zombie villager with a weakness potion, it’s time for the final step—feeding it a golden apple.
Crafting the Golden Apple
To craft a golden apple, place 8 gold ingots and 1 apple in a crafting table. This will give you an enchanted golden apple, which is required for curing zombie villagers.
Feeding the Zombie Villager
Approach the zombie villager and right-click on it while holding the enchanted golden apple. Your character will feed the apple to the zombie villager. This process takes 2 to 5 minutes as the zombie villager shakes, emits red particles, and makes zombie noises. Do not leave the area or the curing process will stop.
Stay within 16 blocks of the zombie villager. After a few minutes, the red particles will turn into purple particles, indicating the zombie villager has been cured. The zombie villager will transform into a normal villager. Congratulations, you’ve cured your first zombie villager!
The newly cured villager will have a random profession, and if it’s a nitwit villager it will not have a profession. You’ll have to place down a new job site block near the villager for it to take on a profession.
Curing zombie villagers is a great way to repopulate a village, gain popularity and get discounts from villagers, or create an iron golem farm. Now you know the basic steps to curing these zombified testificates. With some gold ingots and apples on hand, you’ll be rehabilitating zombie villagers in no time!
Conclusion
Well, there you have it, the step-by-step process to cure a zombie villager in Minecraft and bring those poor souls back from the brink. It may take a bit of work to gather the necessary resources, but the rewards of revived villagers and potential discounts in their shops make it well worth the effort. Now you can rebuild villages, repopulate empty houses, and re-establish trade routes to benefit your entire Minecraft community.
On a side note, you should also learn about "Bad Omens", these are negitive effects that can cause a Zombie raid (many other hostile creatures) to rain down on you! Its good skill to learn how to spot and avoid bad omens.
Not bad for a day's work, eh? Go forth, seek out those zombie villagers, and renew their undead lives with our Minecraft Server Hosting service. The power to restore and rebuild is in your hands. Use it wisely!